A practical guide for laptops and desktops with integrated and dedicated graphics — especially when Chrome-based audio tools feel slow, stutter, or stop responding.
Updated September 23, 2026·NextFeeder Labs
If NextSona shows GPU Slow, AI Vocal takes too long to start, or playback appears to sit at Buffering 0.0s, Chrome may be using the power-saving GPU — or hardware acceleration may not be available.
This guide follows four simple Windows steps. The menu names can vary slightly between Windows 10 and Windows 11.
STEP 1
1. Access Graphics Settings.
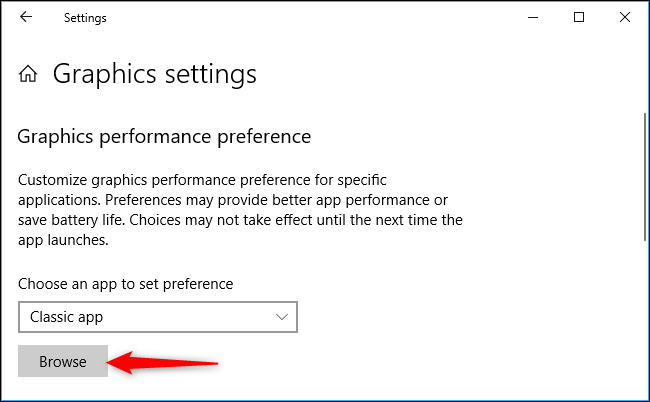
Press the Windows key and search for Graphics settings. On Windows 11, you can also open Settings → System → Display → Graphics.
Open Graphics settings from Windows Settings.
STEP 2
2. Browse for Chrome.
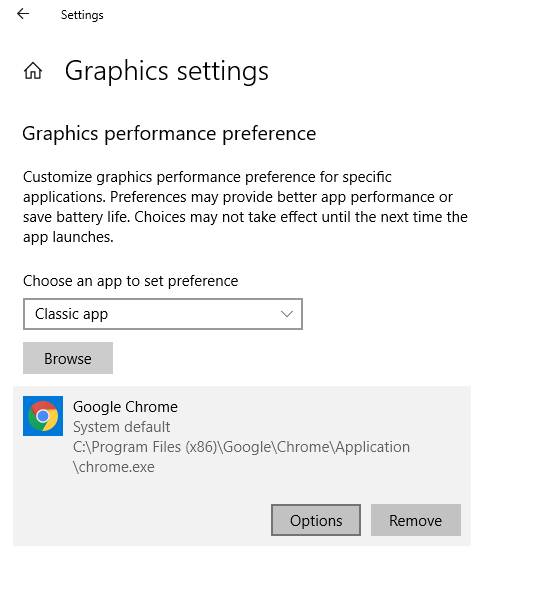
Under the desktop or classic app option, choose Browse and locate the Chrome application file.
Choose the desktop app option, then browse for Chrome.
If your Chrome installation is in a different folder, select the chrome.exe that belongs to the Chrome you normally open.
STEP 3
3. Open Chrome Options.
After Chrome appears in the app list, select it and click Options. If several Chrome entries appear, use the one that points to the installation you actually use.
STEP 4
4. Enable High Performance.
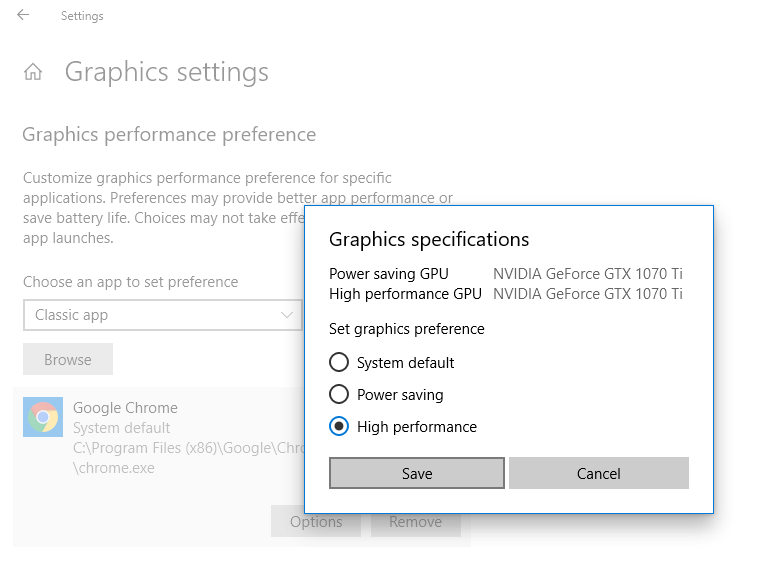
Select High performance, confirm the GPU name shown by Windows, and click Save. Then close every Chrome window and open Chrome again before testing NextSona.
Select High performance, then save the setting.
This is an original NextSona guide based on the Windows and Chrome workflow. Menu names may vary slightly between Windows 10 and Windows 11.